- Upgrading your home heating system is not just about installing a new furnace or boiler. It’s about improving comfort, efficiency, and safety while reducing energy costs over time. However, many homeowners rush into purchases without proper planning, often ending up with a system that doesn’t meet their needs or is unnecessarily expensive. This step-by-step guide will help you approach your home heating upgrade intelligently, with actionable advice, expert insights, and practical tips for every stage of the project.
Step 1: Assess Your Current Heating System
Before planning an upgrade, you need a clear understanding of your existing heating system. Consider the following:
- Age and condition: Most heating systems last 15–20 years. Older units may be less efficient and more prone to breakdowns.
- Performance: Track whether certain rooms are consistently colder than others or if the system struggles during extreme weather.
- Fuel type and costs: Understand whether your system uses natural gas, oil, electricity, or another fuel source, and review current energy bills.
- Maintenance history: Regular maintenance improves efficiency. Determine if your system has been properly maintained.
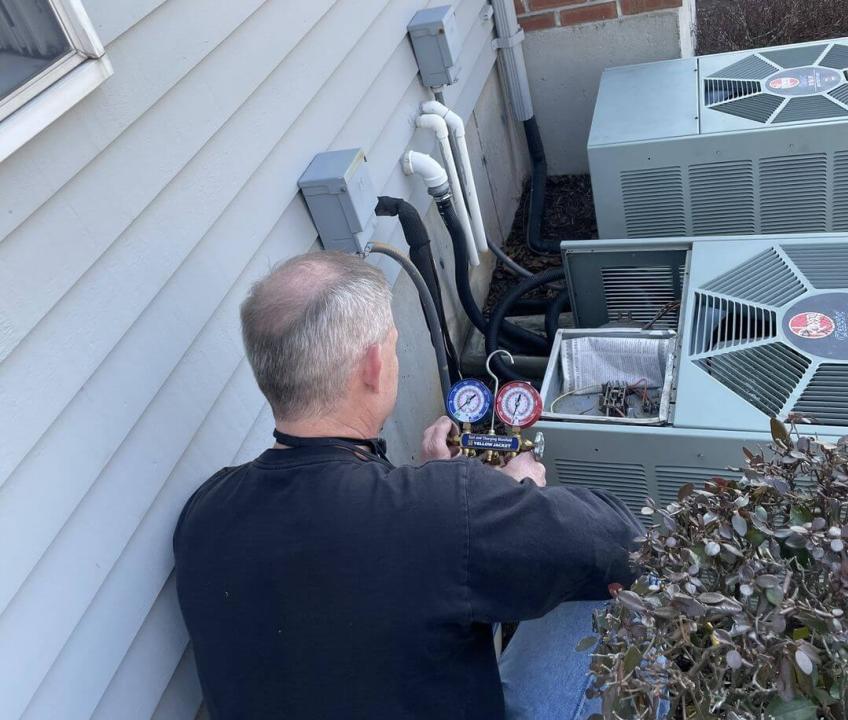
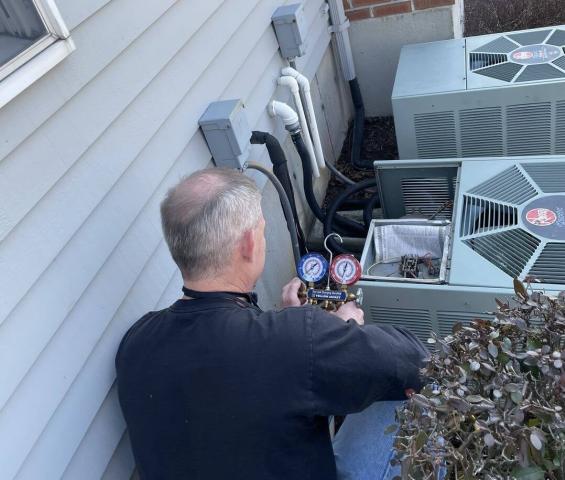
Tip: Conduct a professional heating system inspection. Experts can identify inefficiencies, leaks, or safety hazards that might not be visible to homeowners.
Step 2: Define Your Goals
Upgrading your heating system isn’t just about replacing old equipment—it’s about achieving specific goals. Ask yourself:
- Do you want lower energy bills?
- Are you aiming for better comfort in all rooms?
- Do you want a system that is environmentally friendly?
- Are you considering smart home integration for remote control and automation?
Having clear goals will guide decisions about equipment type, efficiency ratings, and additional upgrades, such as insulation or zoning systems.
Step 3: Understand Your Options
Modern heating systems vary widely in technology, efficiency, and cost. Common options include:
- Furnaces – Traditional and reliable, using gas, oil, or electricity. High-efficiency models can significantly reduce energy bills.
- Boilers – Heat water to provide radiant heat through pipes and radiators. Ideal for older homes or homes with hydronic systems.
- Heat Pumps – Highly energy-efficient, offering both heating and cooling. Best suited for moderate climates, but modern cold-climate models are expanding their range.
- Hybrid Systems – Combine a heat pump with a furnace for maximum efficiency and comfort.
- Radiant Floor Heating – Provides consistent warmth and eliminates cold spots, often used in bathrooms or newly renovated spaces.
Tip: Evaluate the Energy Star rating of each system and consider the seasonal energy efficiency ratio (SEER) for heat pumps or annual fuel utilization efficiency (AFUE) for furnaces.
Step 4: Evaluate Home Efficiency
Even the most efficient heating system can underperform in a poorly insulated home. Consider:
- Insulation: Walls, attics, and crawlspaces should meet modern standards.
- Windows and doors: Check for drafts and consider energy-efficient replacements.
- Air sealing: Leaks around vents, pipes, and electrical outlets can dramatically reduce heating efficiency.
- Thermostats: Smart or programmable thermostats optimize usage and reduce waste.
Actionable Tip: Conduct a home energy audit. Some utility companies offer free or subsidized audits, providing personalized recommendations.
Step 5: Budget Your Upgrade
Heating system upgrades involve upfront costs, but the right planning can maximize long-term savings. Consider:
- Equipment cost: Price varies depending on type, brand, and efficiency rating.
- Installation cost: Professional installation ensures safety and optimal performance.
- Additional upgrades: Zoning, ductwork improvements, insulation, or smart controls.
- Operational cost: Higher efficiency models may cost more initially but save money on energy bills.
Tip: Factor in rebates and incentives. Many states and utilities provide financial incentives for high-efficiency systems.
Step 6: Choose the Right Contractor
Selecting a qualified contractor is crucial. Look for:
- Licensing and insurance: Verify credentials to ensure legal and safe work.
- Experience: Specialists in heating upgrades can recommend the best solutions for your home.
- References and reviews: Check online reviews, ask for referrals, and inspect previous work if possible.
- Transparent estimates: Request detailed quotes that separate equipment, labor, and additional services.
Expert Insight: Avoid choosing solely based on the lowest bid. Expertise, reliability, and long-term support often outweigh initial savings.
Step 7: Decide on System Size and Type
A common mistake is installing an incorrectly sized system. An oversized or undersized unit can cause inefficiency, uneven heating, and premature wear. A professional contractor will:
- Calculate your home’s heating load based on square footage, insulation, and climate.
- Recommend the right system type and capacity.
- Discuss features like zoning or variable-speed blowers for improved comfort.
Step 8: Plan the Installation Process
Scheduling and preparation make a significant difference in a smooth upgrade:
- Timeline: Most residential installations take 1–3 days. Complex systems or additional home modifications may take longer.
- Preparation: Clear access to utility connections, remove furniture near vents, and inform the household of temporary disruptions.
- Safety checks: Ensure fuel lines, wiring, and vents comply with local building codes.
Pro Tip: Ask the contractor to explain the process step-by-step so you understand what will happen at each stage.
Step 9: Monitor and Test the System
Once installed:
- Run the system in different modes to ensure even heating.
- Check thermostats and zoning to confirm proper operation.
- Listen for unusual sounds and observe airflow to detect potential issues early.
- Review energy bills over the first few months to verify efficiency gains.
Tip: Most contractors provide a post-installation inspection or follow-up call. Take advantage of this service to resolve any initial concerns.
Step 10: Maintain Your Heating System
Regular maintenance prolongs the life of your system and keeps efficiency high:
- Annual professional inspections: Check heat exchangers, fuel lines, and ventilation.
- Filter replacement: Clean or replace filters monthly during peak use.
- Ductwork cleaning: Ensure unobstructed airflow and reduce allergens.
- System monitoring: Smart thermostats can provide real-time alerts for irregular performance.
Expert Tip: Keep a log of all maintenance activities, including dates and performed tasks. This ensures warranty compliance and supports future resale value.
Step 11: Explore Energy-Saving Enhancements
Consider additional measures to maximize comfort and reduce costs:
- Zoning systems: Control temperatures in different rooms independently.
- Smart home integration: Automated schedules and remote control via apps.
- Solar-assisted heating: Combine solar panels with heat pumps or hybrid systems for reduced energy dependency.
- Radiant barriers and insulation upgrades: Reduce heat loss, especially in attics.
Step 12: Understand Environmental and Safety Considerations
Upgrading your heating system isn’t only about efficiency; safety and environmental impact are key:
- Carbon monoxide safety: Ensure proper venting and install detectors.
- Fuel choice: High-efficiency gas or electric systems reduce carbon emissions.
- Recycling old equipment: Dispose of old furnaces or boilers according to local regulations.
- Noise and air quality: Choose low-noise systems with built-in air filtration to maintain indoor comfort.
Step 13: Evaluate Long-Term Benefits
A thoughtfully planned upgrade offers more than immediate comfort:
- Lower energy bills: Efficient systems use less fuel for the same heating output.
- Increased home value: Modern systems improve resale appeal.
- Consistent comfort: Reduced hot and cold spots in all rooms.
- Environmental impact: Reduced carbon footprint through efficient energy usage.
Step 14: Troubleshoot Common Issues
Even after installation, minor problems can arise:
- Uneven heating: Check for blocked vents or improperly balanced ducts.
- High energy bills: Review thermostat settings and filter condition.
- Noise: Variable-speed blowers or loose components may require adjustment.
- Short cycling: System frequently turning on and off may indicate incorrect sizing.
Tip: Most issues can be addressed with minor adjustments, but persistent problems require professional inspection.
Step 15: Continuous Improvement
A home heating upgrade is not a one-time task. Continually evaluate and optimize:
- Track energy usage seasonally to detect efficiency drops.
- Update thermostats or controls as new smart technologies become available.
- Schedule regular maintenance and system check-ups.
- Consider complementary upgrades like insulation, smart windows, or ventilation improvements.
Conclusion
Planning a home heating upgrade doesn’t have to be overwhelming. By following these 15 steps, you can make informed decisions, maximize comfort, reduce energy costs, and ensure safety. The key is preparation: assess your current system, define clear goals, evaluate options, and engage qualified professionals. With the right planning, your heating upgrade will provide years of efficient, reliable, and safe warmth for your home.