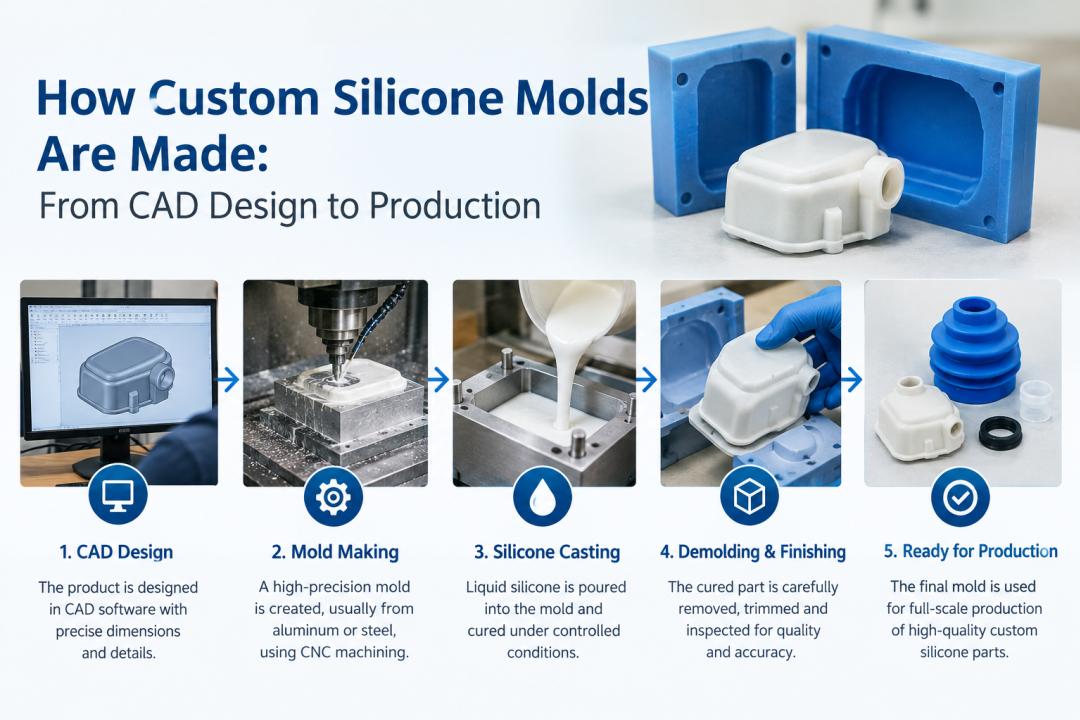
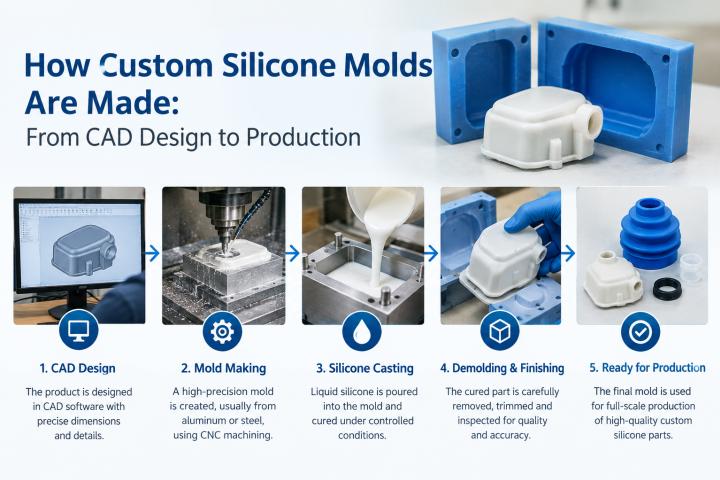
Custom silicone molds don't begin on a factory floor. They begin with an idea, a drawing, and a series of engineering decisions that determine whether the final mold will perform the way it's supposed to. For anyone sourcing molds for the first time — whether for food production, medical devices, or industrial components — understanding this process makes it much easier to evaluate a manufacturer, avoid costly design mistakes, and set realistic expectations around cost and lead time.
This guide walks through exactly how custom silicone molds are developed, from the first CAD sketch to the finished, shipped product.
Why the Manufacturing Process Matters
A finished silicone mold looks simple, but a lot of engineering goes into getting there. Wall thickness, draft angles, parting lines, and silicone hardness all affect how well a mold performs and how long it lasts. Skip a step, or rush through it, and the problems usually don't show up until later — as warped parts, poor release, or a mold that wears out far sooner than it should.
This is exactly why a proper silicone mold making service doesn't jump straight into production. It follows a structured sequence, built to catch design issues early, when they're still cheap and easy to fix — rather than after tooling has already been cut and paid for.
Step 1: Understanding the Application
Every project starts with a conversation, not a drawing. What is the mold actually going to be used for? A mold for chocolate or candy has completely different requirements than one built for a surgical component or an automotive gasket.
At this stage, manufacturers typically discuss:
- What the mold will come into contact with (food, chemicals, heat, or the human body)
- Expected production volume and how long the mold needs to last
- Required tolerances and surface finish
- Industry-specific requirements, such as food-safe or medical-grade compliance
Getting this right early matters, because the intended use directly shapes every decision that follows — including which silicone grade and design approach makes sense.
This stage often reveals a gap many first-time buyers run into — they know what they want the mold to do, but not which silicone grade or hardness will actually get them there. At Rubber Silicone Molds, this is usually where the conversation starts: understanding the real-world use case first, then working backward to the right material and design approach, instead of pushing a standard template that may not fit the application.
Step 2: CAD Design and Engineering
Once the application is understood, the mold is modeled digitally using CAD (Computer-Aided Design) software. This is where most of the real problem-solving happens, long before any physical material is used.
Engineers work through details such as:
- Parting lines — where the mold splits apart to release the finished part
- Draft angles — slight tapers that let parts come out cleanly without tearing or sticking
- Wall thickness — kept as consistent as possible to avoid weak points or uneven shrinkage
- Venting — small channels that allow trapped air to escape during pouring or injection
A well-engineered CAD file dramatically reduces the risk of defects later. It's also standard practice for a manufacturer to share the design with the client for review and sign-off before moving forward — changes are far easier and cheaper to make on screen than after tooling exists.
Step 3: Choosing the Right Silicone Material
Material selection is just as critical as the mold's shape. Silicone isn't a single, uniform product — different grades are chosen for different properties like flexibility, heat resistance, chemical resistance, or biocompatibility.
Common material categories include:
- Food-grade silicone — non-toxic and safe for direct food contact; used for baking, candy, and soap molds
- Medical-grade silicone — biocompatible, sterilizable, and tested against strict healthcare safety standards
- Industrial-grade silicone — engineered to resist heat, chemicals, and repeated mechanical stress in demanding settings
For industrial silicone molds specifically, long-term durability is usually the deciding factor, since these molds may be used thousands of times in continuous production without losing shape or performance.
Step 4: Tooling and Prototype Development
With the design finalized and material chosen, the manufacturer builds the tooling needed to physically produce the mold. In most cases, a prototype is created first, so the design can be tested in the real world before committing to full-scale production.
Prototyping helps confirm:
- Whether the finished part releases cleanly from the mold
- Whether dimensions match the CAD design within tolerance
- Whether the silicone's hardness and texture feel right in practice
- Whether any adjustments are needed before scaling up
Skipping this stage is one of the most common reasons projects run into trouble later — issues that would've been minor and cheap to fix at the prototype stage can become expensive once full tooling is locked in. This is also where a lot of manufacturers cut corners to save time, skipping the prototype stage or approving it too quickly. At Rubber Silicone Molds, prototypes are treated as a checkpoint, not a formality, since catching a fit or release issue here costs far less than discovering it after a full production run.
Step 5: Production Molding
Once the prototype is approved, the mold moves into production. Depending on complexity, part size, and required volume, this may involve compression molding, injection molding, or liquid injection molding (LIM) — each suited to different shapes and production speeds.
Consistency is the priority during this stage. Reputable manufacturers closely monitor curing time, temperature, and pressure, since even small variations can throw off dimensions or surface quality across a production run.
Step 6: Quality Control and Testing
Before molds are packaged and shipped, they go through inspection to confirm they meet agreed specifications. Depending on the mold's intended use, this can include dimensional checks, visual inspection for surface defects, and material testing — especially critical for food-safe or medical-grade molds, where regulatory compliance isn't optional.
A manufacturer with solid quality control in place should be able to clearly explain how they test their molds and what documentation, if any, comes with the order.
Step 7: Packaging and Delivery
The final stage involves packaging the molds appropriately for shipping, along with any relevant documentation — design files, material certifications, or usage guidelines. For businesses ordering in bulk, this is also when lead times and reorder support are typically confirmed.
What This Means for Buyers
Understanding this process gives buyers a much clearer picture of where the cost and time actually come from. A simple, single-cavity mold with no special material requirements moves through these steps quickly. A complex, multi-cavity mold for medical or industrial use — with tight tolerances and material certifications — naturally takes longer, since more time goes into design review and testing.
When evaluating a custom silicone mold manufacturer, it's worth asking how they handle each of these stages directly: Do they review the CAD design with you before cutting tooling? Do they build and test a prototype before full production? What quality checks happen before shipping? These are the same questions Rubber Silicone Molds gets asked regularly by buyers who've been burned before by manufacturers who skipped a step to save time — and the answers to these questions usually say a lot about how reliable the final molds will be.
Frequently Asked Questions
How are custom silicone molds made?
Custom silicone molds are made by first designing the part in CAD software, selecting the right silicone grade for the application, building a prototype to test fit and function, and then moving into full production using compression, injection, or liquid injection molding.
How long does it take to make a custom silicone mold?
A simple single-cavity mold can often be completed in a couple of weeks, while multi-cavity or medical-grade molds requiring certification and extensive testing can take several weeks longer.
What file format is needed to manufacture a custom silicone mold?
Most manufacturers work from CAD files such as STEP, IGES, or STL. If you don't have one, many silicone mold making services can create a CAD file from a sketch, sample, or product description.
What is the difference between food-grade and industrial silicone molds?
Food-grade silicone is non-toxic and safe for direct food contact, used in baking and candy molds. Industrial silicone molds are built to withstand higher mechanical stress, heat, and chemical exposure over repeated production cycles.
How much does a custom silicone mold cost?
Cost depends on size, complexity, cavity count, silicone grade, and production volume — simple food-safe molds cost less than medical-grade or industrial molds requiring tight tolerances and certification.