With the growing demand for rural banking and financial inclusion, AEPS (Aadhaar Enabled Payment System) has become a game-changer. Many entrepreneurs, developers, and fintech startups are now looking to build their own AEPS Software for B2B portals. If you're planning to launch a platform that allows retailers or agents to offer AEPS services, this step-by-step guide will walk you through the entire process from concept to launch.
Let’s explore how to build a reliable and scalable AEPS software for B2B use in India’s booming digital economy.
Step 1: Understand What AEPS Software Does
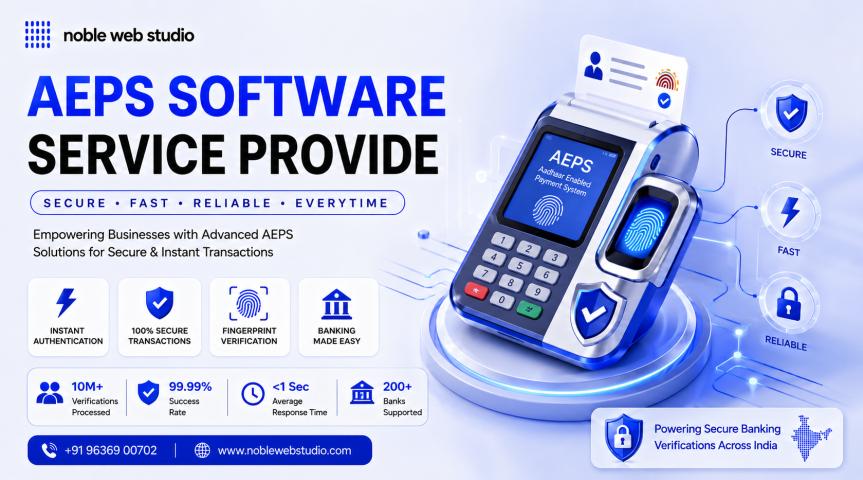
AEPS Software enables users to perform banking services like cash withdrawal, balance inquiry, mini statements, and fund transfers using Aadhaar-based biometric authentication. It is built on the NPCI platform and designed to bring banking access to people in remote areas, especially through B2B agent networks.
AEPS software for B2B portals helps agents and distributors offer banking services and earn commissions while serving the unbanked population.
Step 2: Market Research and Planning
Before development, it’s important to:
-
Identify your target audience – agents, CSPs (Customer Service Points), distributors.
-
Understand NPCI and bank guidelines for AEPS integration.
-
Analyze your competition – learn what top AEPS providers offer and what can be improved.
-
Finalize your business model – commission-based, SaaS subscription, or white-label resale.
Planning ensures that the software meets real market needs and complies with financial regulations.
Step 3: Partner with a Bank or Sponsor Bank
To operate AEPS services, your platform must be connected to a certified bank that is part of the NPCI AEPS network. You can:
-
Become a business correspondent (BC) of a sponsor bank.
-
Partner with a licensed AEPS API provider who already has banking approvals.
This step is crucial for secure, compliant AEPS transactions.
Step 4: Get AEPS API from a Trusted Provider
You will need an AEPS API to perform secure transactions between the software and the bank servers. Look for providers that offer:
-
NPCI-certified AEPS APIs
-
Fast transaction speeds
-
Biometric device integration support
-
24/7 technical support
Top AEPS API providers also offer demo accounts and easy integration guides for developers.
Step 5: Design the Frontend User Interface
The frontend should be simple and mobile-friendly. Consider these features:
-
Login & dashboard for agents
-
Biometric device setup guide
-
Service menu (withdrawal, balance check, mini statement)
-
Wallet balance and transaction history
-
AEPS commission details
Make sure your UI/UX is optimized for local agents who may not be highly tech-savvy.
Step 6: Build the Backend & Admin Panel
Your backend should be built with a strong tech stack like PHP, Node.js, or Python with a secure database. Admin panel features should include:
-
Agent onboarding and KYC
-
Wallet management
-
Commission control
-
Settlement reports
-
User role control (Admin, Distributor, Retailer)
Also, ensure data encryption and OTP security for all transactions.
Step 7: Integrate Biometric Devices
AEPS requires fingerprint authentication via RD (Registered Devices). Ensure your software supports:
-
Morpho, Mantra, Startek, and other RD devices
-
RD service APIs and error handling
-
Device setup help and support
Test biometric responses thoroughly before going live.
Step 8: Enable Wallet & Payout Systems
Since agents earn commissions, a digital wallet must be integrated. Include:
-
Real-time wallet updates
-
Manual or automated settlements
-
Fund transfer to bank accounts
-
Ledger and transaction summary
This boosts transparency and trust in your platform.
Step 9: Comply with NPCI Guidelines
Before launch, make sure your AEPS software follows:
-
NPCI's compliance checklist
-
Bank partner’s KYC and AML policies
-
Aadhaar and UIDAI authentication norms
Non-compliance may result in suspension or penalties, so consult with legal/financial experts.
Step 10: Testing and Final Deployment
Before making your AEPS software live:
-
Test with multiple biometric devices
-
Simulate AEPS transactions
-
Review backend workflows
-
Conduct beta testing with real agents
Once stable, deploy on a secure hosting environment with regular data backups.
Step 11: Launch & Provide Support
After launch:
-
Onboard agents and distributors with training.
-
Set up a customer support team.
-
Monitor real-time issues and offer updates.
-
Promote your platform to expand your B2B agent network.
Timely updates and strong support build trust and long-term partnerships.
Conclusion
Building an AEPS Software for B2B portals is a powerful opportunity in India’s digital finance revolution. With careful planning, the right AEPS API integration, and a user-friendly design, your platform can empower thousands of agents and retailers to offer banking services in underserved areas.
Whether you're a startup or software developer, this step-by-step guide can help you build a strong and secure AEPS solution that supports financial inclusion in India.