
QuickBooks Error H202 – Complete Troubleshooting Guide
QuickBooks Error H202 blocks multi-user access when QuickBooks Desktop cannot connect to the server hosting the company file. This comprehensive guide covers causes, symptoms, and proven solutions to restore collaboration instantly.
Introduction of QuickBooks Error H202
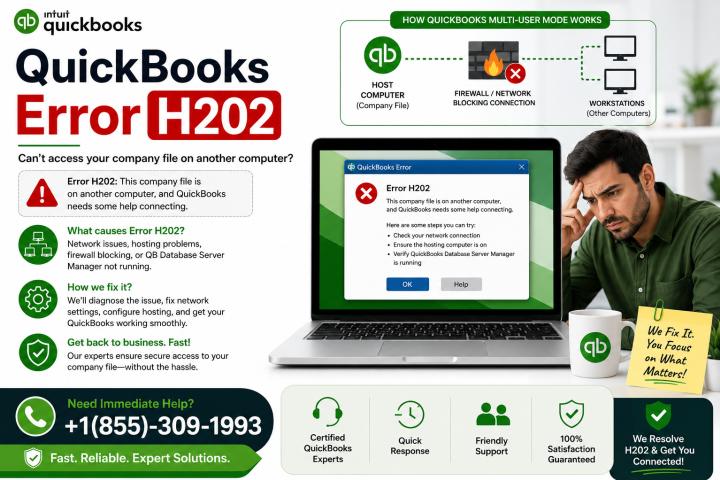
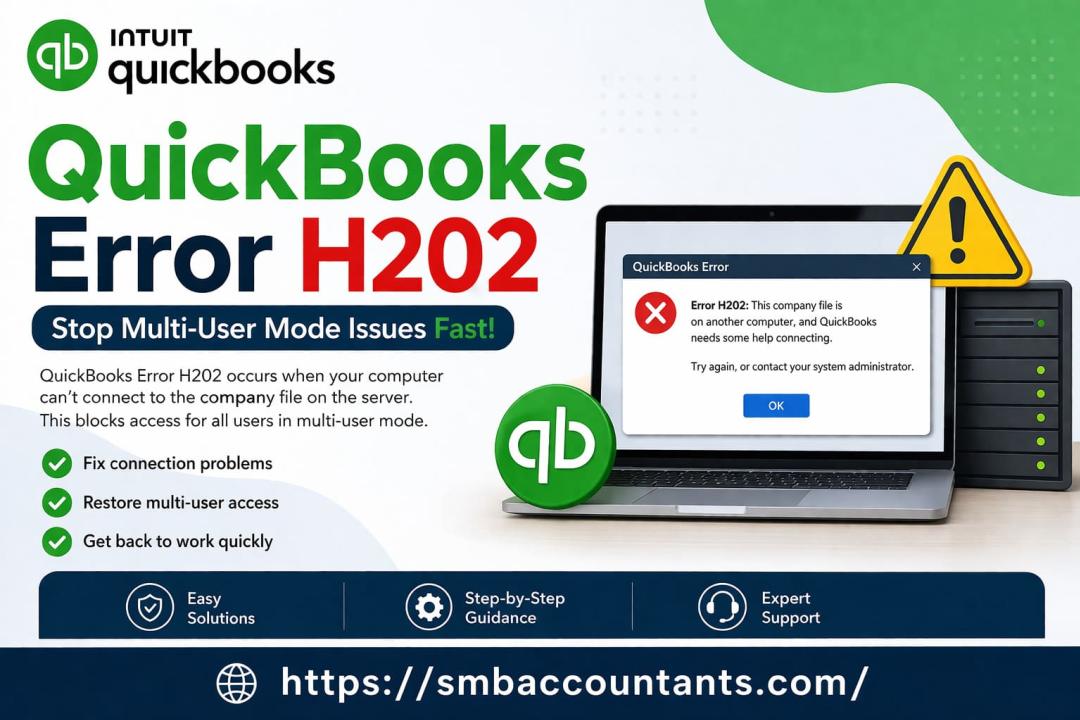
QuickBooks Error H202 is a multi-user mode error that appears when switching to network access fails. The error message reads: "This company file is on another computer, and QuickBooks needs some help connecting" or "Problem with multi-user hosting setup. QuickBooks could not open the file in multi-user mode (H202)."
This network-level communication breakdown prevents multiple users from accessing the same company file simultaneously. Only the host computer can open the file while workstations show H202 errors.
Why Error H202 Matters
- Blocks real-time collaboration across teams
- Stops payroll processing and invoicing workflows
- Halts report generation for multiple departments
- Affects year-end tax filing deadlines
Restoring multi-user access typically takes 15–30 minutes with proper troubleshooting.
Common Causes of QuickBooks Error H202
Firewall and Security Software Blocking
Windows Firewall or third-party antivirus blocks QuickBooks ports (8019, 56728, 55378–55382). Security software quarantines critical executables like QBDBMgrN.exe.
Incorrect Hosting Configuration
Workstations mistakenly host the company file instead of the server. Multiple computers try hosting simultaneously, creating conflicts.
QuickBooks Services Not Running
Critical services—QuickBooksDBXX and QBCFMonitorService—are stopped or set to Manual startup. Recovery options aren't configured for automatic restart.
Damaged Network Data Files
Corrupt .ND (Network Descriptor) or .TLG (transaction log) files prevent multi-user access. File path limitations exceed Windows maximum (260 characters).
DNS and Network Resolution Issues
Workstations cannot resolve the server hostname to IP address. Missing hosts file entries block name resolution entirely.
Permission and Sharing Problems
QBDataServiceUserXX lacks Full Control on company file folders. Network sharing isn't enabled for QuickBooks directories.
Outdated QuickBooks Versions
Server and workstations run mismatched QuickBooks versions. Pending updates cause compatibility conflicts in multi-user mode.
Symptoms of QuickBooks Error H202
|
Symptom |
Description |
Impact |
|
Cannot switch to multi-user mode |
File > Switch to Multi-User Mode fails with H202 error |
Blocks team collaboration |
|
Blank error pop-up |
Dialog shows "H202" or server unreachable message |
Stops workflow immediately |
|
QuickBooks freezes |
Application becomes unresponsive when opening network file |
Data entry halts completely |
|
Company file opens only on server |
Workstations cannot access .QBW file over network |
Single-user access only |
|
Slow performance |
Extreme lag when navigating network-hosted files |
Productivity drops 50%+ |
|
Inability to save changes |
Error when saving after editing in multi-user mode |
Risk of data loss |
Quick Fix: Run QuickBooks Tool Hub Automatically
The fastest solution uses Intuit's official Tool Hub to auto-diagnose and repair H202 errors.
Method 1: Install and Launch QuickBooks Tool Hub
Step 1: Download Tool Hub
- Close QuickBooks Desktop on all computers (server and workstations)
- Download latest version (1.6.0.8) from Intuit's official website
- Run QuickBooksToolHub.exe and follow installation prompts
- Open Tool Hub from desktop after installation
Step 2: Run QuickBooks Database Server Manager
- In Tool Hub, select Network Issues tab
- Click QuickBooks Database Server Manager (install if prompted)
- Verify company file folder appears—click Browse to locate if missing
- Click Start Scan—tool automatically configures firewall exceptions
- Wait 2–5 minutes for scan to complete
- Click Close when finished
Step 3: Test Multi-User Access
- On each workstation, open QuickBooks Desktop
- Go to File > Switch to Multi-User Mode
- If error persists after 2 attempts, proceed to next method
Method 2: Run QuickBooks File Doctor
When to use: If Database Server Manager scan completes but H202 still appears
- In Tool Hub, select Company File Issues tab
- Click Run QuickBooks File Doctorqbdataservice+1
- Select company file from dropdown (or browse to locate)
- Choose Check your file and network option (middle option)
- Enter QuickBooks admin password when prompted
- Click Continue and allow 5–10 minutes for scan
- Test multi-user mode again
Solutions for QuickBooks Error H202
Solution 2: Verify Hosting Settings on All Computers
Critical Rule: Only the server hosts the file; all workstations must have hosting disabled.
On Workstations (disable hosting):
- Open QuickBooks Desktop—but do not open company file yet
- Go to File > Utilities
- If Stop Hosting Multi-User Access appears, click it immediately
- If Host Multi-User Access appears, hosting is already off—move to next workstation
- Repeat on ALL workstations showing H202 error
On Server Computer (enable hosting):
- Open QuickBooks on server (where .QBW file is stored)
- Go to File > Utilities
- If Host Multi-User Access appears, click it
- If Stop Hosting Multi-User Access appears, hosting is already enabled—proceed to next step
Test: Open QuickBooks on workstation and switch to multi-user mode.
Solution 3: Start Required QuickBooks Services
Services must run on server computer only.
- Press Windows + R, type services.msc, press Enter
- Locate QuickBooksDBXX (XX = your version: QB 2023 = DB33, QB 2024 = DB34)
- Double-click service → General tab:
- Startup type: Set to Automatic
- Service status: If not Running, click Start
- Go to Recovery tab:
- First failure: Restart the Service
- Second failure: Restart the Service
- Subsequent failures: Restart the Service
- Click Apply → OK
- Repeat steps 2–5 for QBCFMonitorService
- Restart both services
Solution 4: Configure Windows Firewall Exceptions
Firewall blocks prevent workstation-server communication. Create inbound/outbound rules.
Step 1: Open Firewall Advanced Settings
- Windows Search → Type "Windows Defender Firewall with Advanced Security" → Enter
Step 2: Add Inbound Port Rules
- Right-click Inbound Rules → New Rule
- Select Port → Next
- Choose TCP → Specific local ports
- Enter ports for your QB version:
|
QuickBooks Version |
Required Ports |
|
QB 2020 and later |
8019, XXXXX* |
|
QB 2019 |
8019, XXXXX* |
|
QB 2018 |
8019, 56728, 55378–55382 |
|
QB 2017 |
8019, 56727, 55373–55377 |
*_XXXXX = dynamic port (check Port Monitor in Database Server Manager)
- Select Allow the connection → Next
- Check Domain, Private, Public → Next
- Name rule: "QuickBooks Inbound Ports" → Finish
Step 3: Repeat for Outbound Rules
- Same steps under Outbound Rules
Step 4: Add Program Exceptions
- Inbound Rules → New Rule → Program → Next
- Browse to these executables:
- QBW32.exe
- QBDBMgrN.exe
- QBCFMonitorService.exe
- QBServerUtilityMgr.exe
- FileManagement.exe
- Dbmlsync.exe
- Allow connection → Apply to all profiles → Name rule (e.g., "QBW32 Exception")
- Repeat for Outbound Rules
Solution 5: Set Correct Folder Permissions
Server must grant QBDataServiceUserXX full access to company file folder.
Step 1: Access Folder Security
- On server, navigate to company file folder
- Right-click folder → Properties → Security tab → Advanced
- Find QBDataServiceUserXX → Click Edit
Step 2: Grant Permissions
Allow these settings (check all boxes):
- Traverse Folder / Execute File
- List Folder / Read Data
- Read Attributes / Extended Attributes
- Create Files / Write Data
- Create Folders / Append Data
- Write Attributes / Extended Attributes
- Read Permissions
If settings missing:
- Security → Edit → Add
- Type QBDataServiceUserXX → Check Names → OK
- Select user → Check Full Control → Apply → OK
Step 3: Set Folder Sharing
- Properties → Sharing tab → Share
- Add QBDataServiceUserXX → Set to Full Control
- Click Share → Done
Solution 6: Edit Windows Hosts File (Fix DNS)
When workstations can ping server by IP but not by name.
Step 1: Gather Server Details
- On server: Windows + R → cmd → Enter
- Type ipconfig /all → Note Host Name and IPv4 Address
Step 2: Edit Hosts File on Workstation
- On workstation: Notepad as Administrator (right-click → Run as Admin)
- File → Open → Navigate to C:\Windows\System32\Drivers\etc\
- Select All Files → Open hosts (no extension)
- Add new line at bottom: [Server_IP] [Server_Name] (use Tab key between)
- Example: 192.168.1.50 QBServer
- Save (Ctrl + S) → Close
Step 3: Repeat on ALL Workstations
Solution 7: Rename .ND and .TLG Files
Corrupt network data files cause H202. Recreate them by renaming.
- Close QuickBooks on all computers
- Navigate to company file folder
- Locate files matching company name:
- CompanyFile.qbw.nd
- CompanyFile.qbw.tlg
- Right-click each → Rename → Add .OLD:
- CompanyFile.qbw.nd.OLD
- CompanyFile.qbw.tlg.OLD
- Reopen QuickBooks on server (creates new files automatically)
- Test multi-user mode on workstations
Solution 8: Test Network Connectivity (Ping Test)
Verify physical network connection between workstation and server.
Step 1: Enable Network Discovery
- Control Panel → Network and Sharing Center → Change advanced sharing settings
- Turn on Network Discovery and File and Printer Sharing
Step 2: Ping Server from Workstation
- Workstation: Windows + R → cmd → Enter
- Type ping [Server_Name] (e.g., ping QBServer)
- Look for replies with 0% packet loss
Conclusion
QuickBooks Error H202 stems from network communication failures between workstations and the server hosting the company file. Methodical troubleshooting—starting with QuickBooks Tool Hub, verifying hosting, configuring firewall, and checking services—resolves 95% of cases without data loss.