Background removal tools have come a long way, thanks to AI-powered technology. But even with smart tools, it’s easy to make mistakes that ruin the final image, especially if you're preparing product photos, social media visuals, or any content that requires a clean, professional look.
5 Mistakes to Avoid When Using a Background Remover
Here are the top 5 mistakes to avoid when using a background remover—plus a trusted professional solution if you want flawless results every time.
1. Using Low-Quality or Blurry Images
No background remover can work well with poor-quality images. Blurry photos or images with unclear edges confuse the AI and result in rough cuts or incomplete removal.
Fix it: Use high-resolution, well-lit images with a clear contrast between the subject and the background. If you’re stuck with a blurry image, try using an image upscaling tool before removing the background.
2. Rushing the Process
Quick background removal can leave behind unwanted artifacts, jagged edges, or missed spots. It might save time initially, but it often leads to rework.
Fix it: Take a moment to review the results. Zoom in on the edges, and if needed, manually refine them using the tool’s eraser or brush function.
3. Ignoring the Subject’s Fine Details
Hair strands, transparent fabrics, or intricate designs often get cut out poorly if you don't pay attention to the small details.
Fix it: Use tools that offer edge refinement or feathering to handle delicate areas. Manually touch up areas where necessary to maintain a natural look.
4. Saving in the Wrong File Format
One of the most common errors is saving your background-removed image in a format that doesn't support transparency, like JPEG.
Fix it: Always save in PNG format if you need a transparent background. If you're working with vector elements or logos, consider SVG for scalability and transparency.
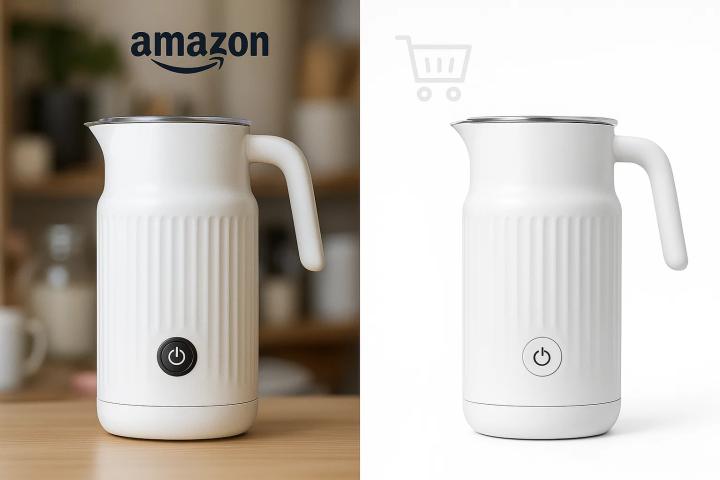
5. Not Matching the New Background Properly
Even after a perfect cutout, dropping the subject into a mismatched background can ruin the illusion. Differences in lighting, shadows, or resolution make the subject look "pasted on."
Fix it: Adjust the lighting, add shadows, and ensure your new background matches the tone and perspective of the subject.
Want Perfect Results? Use Clipping World
While DIY background removal tools can work for basic jobs, they often fall short when dealing with complex images, multiple subjects, or professional-quality expectations.
That’s where Clipping World comes in.
Clipping World offers manual background removal service done by skilled editors who focus on every pixel, especially useful for ecommerce, fashion, product photos, and advertising. Whether it's fine hair detail or complex object edges, their hand-drawn clipping paths ensure precision and clean results without compromising image quality.
Conclusion
Avoiding these five common background removal mistakes can help you get cleaner, more professional visuals. But for best-in-class results—especially when your image quality really matters—partnering with a service like Clipping World is your safest bet.