Summary: If you have a query like how to open OST file into Outlook 2019, 2016, or below versions, here is the answer to your query. In this write-up, you will get a detailed answer to the query. Why do you need to open an .ost file? How to access the file content? What should be the best solution to open OST file? So, read till the end.
Introduction
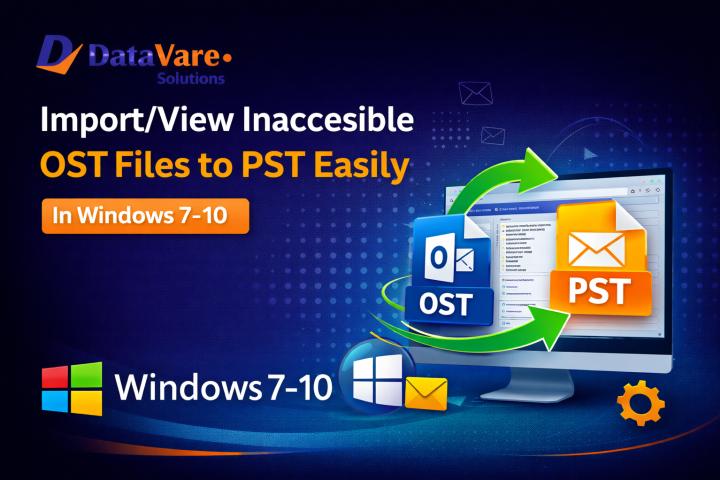
‘Offline Storage Table’, which is abbreviated as OST and is also known as Offline Outlook data file, keeps a synchronized copy of the mailbox information on your local computer. It is a type of file used by Microsoft Outlook applications, Office 365, Exchange, IMAP, and Outlook.com.
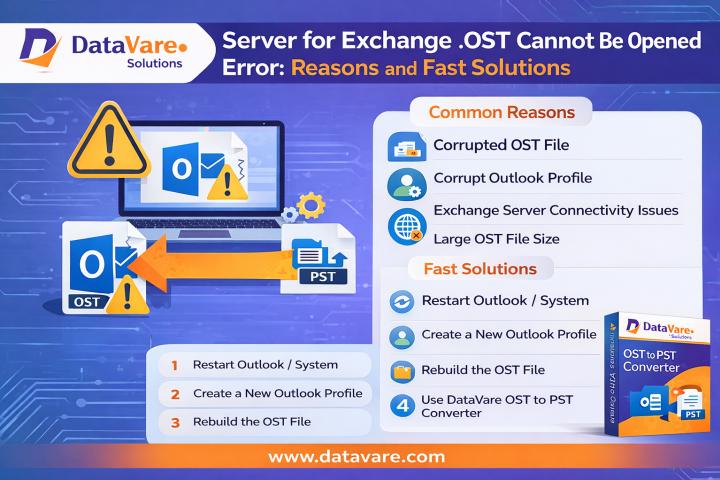
Sometimes, an OST file gets damaged and it becomes completely unreadable. So, if you want to read corrupted files, you need to repair them first. Only then can you open the OST file in Outlook 2019,2016,2013,2010. Outlook is a popular email client for users. It provides a wide range of collaboration, messaging, and security features.
Read below the circumstances in which users will have to open an OST file in Outlook 2010.
Why Do You Need to Open OST File into Outlook?
There may be many reasons why one needs to OST file to Outlook. Below, we discuss some of the most prominent scenarios for opening OST files in Outlook 2010.
When you are transferring data from one device to another. You need to transfer the OST file to Outlook on the other machine.
Sometimes, the MS Exchange server crashes unexpectedly due to various reasons, like
Power Failure
Malicious and Virus attacks on your system.
When the available storage space has depleted. You need to export the OST file to Outlook.
In a network problem during file synchronization.
These reasons caused you to transfer your OST file to another machine and open the OST file in Outlook. Let us check how to open OST files in Outlook 2013.
Manual Method to Import OST into Outlook
You can adopt numerous techniques to open OST files into Outlook applications. We will discuss some of the most popular methods. However, basic knowledge of Outlook features is mandatory to perform the steps.
1. Through the Import/Export Feature
Open the Outlook application on your system and go to the File options.
Click the Open & Export. Then, press the Import/Export icon.
Now, click and select the Export to a file option and click the Next button.
Select the Outlook Data File (.pst) from the options and hit Next.
Now, browse the location where you want to save the file. Mark the Replace duplicate with items imported and then click the Next button.
Select the PST files that you need to import, mark the Import items into the same folder in the options, and then click on the Finish button to complete the process.
2. AutoArchive Outlook Mailbox
Open the Outlook app and click on the File button.
Now, choose the Options. It will open the Options wizard.
Click on the Advanced tab option and click on the AutoArchive
Choose the archive frequency and other options.
Finally, click on the OK button to make the changes.
In the above steps, we show the manual method to open OST file into Outlook, but it has some limitations. The may be a possibility that OST cannot be opened Outlook 2013. DIY solutions are not preferred by every user. These techniques have numerous limitations.
Limitations of the Manual Method
A manual approach to open OST files in Outlook 2013 is considered efficient but not feasible for everyone. Most users experience the following issues with DIY solutions.
Complicated and time-consuming steps.
Chances of file corruption are high.
You cannot import complete data using the manual steps.
Now, you might be thinking, if the above methods are not suitable, what should we do? The answer is to convert OST to PST file format using a professional tool. OST files are vulnerable and can get damaged. Also, you cannot share and transfer such files.
We suggest the best alternative to the complicated manual methods.
Professional Method to Open OST File into Outlook
CloudMigration OST to PST Converter Tool comes in handy for every Outlook user. It efficiently converts all your Outlook OST file content into PST file format without disturbing the file integrity. It provides numerous advanced features to make the migration smooth and precise. Therefore, it is the complete solution for both beginners and advanced users.
Import OST file to Outlook Steps
1. Download and install the CloudMigration OST to PST Converter Tool on your system.
2. Now, you will be able to select either the Single file or Multiple files/ folders option to browse for the OST files you want to convert.
3. After you add the OST files, click on Next.
4. Now, you will be prompted to select the saving format you would like for the resultant output. We used the PST file format in this example.
5. The tool was built with advanced inbuilt features that you can use if it is required.
6. Select the path to save the resultant PST file and click on the convert button to start the conversion process.
7. After completion, download the log report after the completion of the OST to PST conversion process.
Conclusion
In the above article, we have explained what Outlook OST files are and why you may require importing them into the Outlook application. We provide you with feasible techniques to do so. However, a better alternative to the situation is to convert your Outlook OST files to PST file format using the professional tool.