Summary
Microsoft 365 (formerly known as Office 365) is used by many individuals and businesses to manage emails, calendars, tasks, documents and other important information. However, it is a good idea to keep a separate copy of important mailbox data for reasons of data protection, offline access, migration and long-term record keeping.
Choosing the best Office 365 backup method can help make the process easier and more organized. To meet users’ needs, users can convert their mailbox data into formats like PST, MSG, EML, and MBOX.
In this article, we will talk about the best way to Datavare Office 365 backup emails, list the key features of Office 365 Backup Software, and guide you step by step to export mailbox data to local computer.
Why You Should Backup Office 365 Emails?
Microsoft 365 is a cloud-based service, but there are many reasons why you might want to keep a local copy of critical data.
- Data protection: Maintain a separate copy of important business and personal e-mails.
- Offline access: View exported messages in compatible desktop applications.
- Migration: Prepare your email data for transfer to another email platform.
- Long-term archiving: Save important correspondence for future reference.
- Selective storage: Store selected folders instead of a whole mailbox.
- Flexible file formats: Pick the output format that best suits your email client or storage needs.
A separate backup offers greater control of email data. But it should be used to augment, not replace, appropriate account security and organizational retention policies.
Best Method to Backup Office 365 Emails
There are two common approaches to view.
1. Manual Export Using Microsoft Outlook
If your organization allows it and you have a mailbox in Outlook, you can export supported mailbox data in PST format by using the built-in Outlook export functionality. The choices available might be different depending on your version of Outlook and how your account is set up.
This method is handy for users who require a simple export and are comfortable with working with Outlook.
2. Employ Office 365 Backup Software
A dedicated backup utility can come in handy when you want more control of folder selection, output formats, and local storage.” Office 365 Backup Software is designed to connect to an Office 365 account and export supported mailbox data to PST, MSG, EML, EMLX and MBOX formats.
It also says it can export only the data you select, save to local destination folders and continue a conversion process after some connection interruptions.
Key Office 365 Backup Software Features
1. Choose Mailbox Backup
Users can choose specific folders to export instead of exporting the entire mailbox. This can be useful if you want to save only certain projects, clients, or important email conversations.
2. Multiple Choices for Export
The software supports several output formats such as:
- Compatible with Microsoft Outlook PST workflows
- MSG for individual e-mail messages
- Compatible email apps: EML and EMLX formats
- Supported email clients and MBOX for archiving workflows
- Select the format that corresponds to the application you will use to access the exported data.
3. Local Storage Choices
The program lets the user choose a folder on their computer to store the exported data. This helps users to organize their backup files according to their storage needs.
To further protect it, consider keeping a second copy on a different drive or location that is properly backed up.
4. Types of Office 365 Data to Migrate
On the product page it says it supports export of various kinds of account data like emails, calendars, notes, tasks and documents. Depending on the account details and export options supported by the software, some items may not be available.
5. Process control backup
The product page states that users will be able to control the export process and resume the process after some server-related interruptions. This can be useful if a backup is interrupted due to connectivity problems.
6. Easy Workflow
The software is designed to guide users through connecting their accounts, selecting data, choosing output formats, and configuring destinations without having to go through a complex manual process.
How to Backup Office 365 Emails: A Step-by-Step Guide
To export your Office 365 emails, please follow these steps: Office 365 Backup Software
Step 1: Download and Install the Software
Check the official product page:
Download the correct version and install it on your PC. Just follow the installation instructions and run the app.
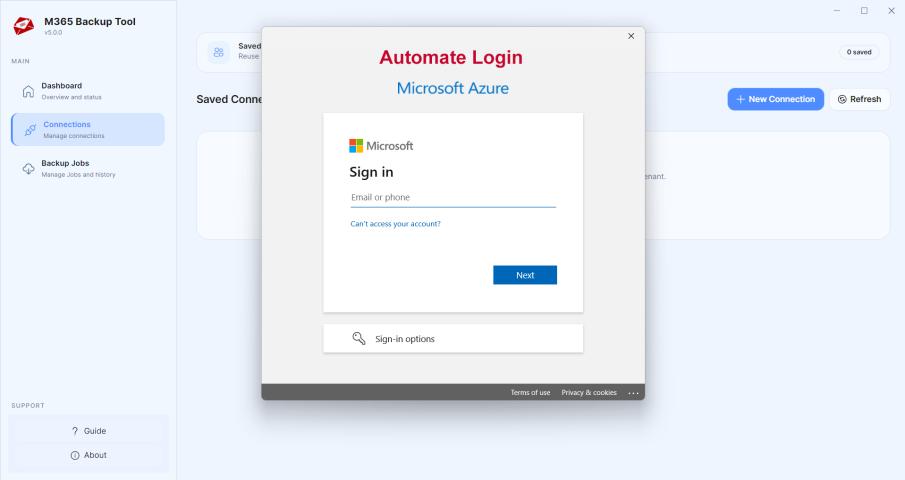
Step 2: Link your Office 365 account
When prompted, run the software and specify your Office 365 account information.
Finish the authentication process. Depending on how your organization has set up Microsoft 365, additional verification or administrator approval might be needed.
Tip: Make sure you are logged into the correct account and have the necessary permissions before you start the backup.
Step 3: Select the Mailbox Folders You Want
Once successfully connected, go through the available data in the mailbox.
Choose the folders that you want to back up. For example, you can select Inbox, Sent Items, or specific project folders.
If you need a wider backup, choose the option of exporting all supported data.
Step 4: Select an Output Format
Choose the output format that works best for you.
Choose PST if you need an Outlook data file that is compatible.
If you want to have individual message files use MSG.
Use EML or EMLX for email applications that support it.
If your application supports it, select MBOX.
Note: Make sure the format you choose is supported by your email client of choice before proceeding.
Step 5: Select destination folder
Choose where on your computer you want to save the exported files.
Select a location with sufficient free storage. For large mailboxes, make sure the destination drive has sufficient space for the expected backup size.
One copy of critical data is never enough. For better protection, don’t rely on only one copy.
Step 6. Start the Backup Process
Check selected folders, output format and output folder. In the application use the relevant option to start the export.
Let the process complete. If you receive an error message, verify the connection, authentication, free space, and software messages, then retry.
Step 7: Check the Exported Data
When the process is complete, open the destination folder and check that the output files you expect have been created.
If possible, open the exported data in a compatible application. Sample messages, attachments, dates, and folder organization to review and make sure the backup is what you want.
A backup is not complete until you have verified that the files created are usable.
Typical Office 365 Backup Problems & Resolutions
Problem 1: Account Verification Fails
One way to solve this is to verify your account credentials, review the sign-in flow, and verify that your Microsoft 365 admin hasn’t restricted the necessary access. Complete any other authentication steps that are requested.
Problem 2: The backup fails before it completes
One fix is to ensure you have an internet connection and your account is available. If the application allows you to resume, use the resume option available after fixing the problem.
Problem 3: Insufficient Storage Space
Possible solution: check free space on destination drive. Find a suitable location or free up storage and try the backup again.
Problem 4. Exported File Cannot be Opened
Possible solution: Make sure you selected the correct output format, and you are using an application supporting the format. Test the backup with a small sample before exporting a large mailbox if possible.
Problem 5: Several Folders are Gone
Potential fix: Check the folder-selection options, and make sure the required folders were selected. Also, verify whether there are account permissions or supported export scope of the software that limits access to specific items.
Office 365 Email Backup Best Practices
A more reliable backup workflow might look something like this:
- Back up important email data regularly, according to your needs.
- Select the output format before you start the export.
- Check the exported files after each backup.
- Maintain a separate, secure copy in another place.
- Keep backup files secure as they may contain sensitive business information.
- Check organizational policies and Microsoft 365 permissions before exporting company data.
- Periodically test the recovery or import process to make sure the backup is usable.
Conclusion
Your mailbox size, export requirements, available tools, and preferred storage location will determine the best way to backup Office 365 emails. Outlook’s built-in export feature may be enough for simple PST exports, but a dedicated tool can be helpful if you need other export formats or want to export only certain folders.
Office 365 Backup Software comes with features like account connection, folder selection, multiple export formats, and local storage. By following the step by step process and verifying the exported files, users can set up a more organized way of preserving important email data.
Frequently Asked Questions
1. How to backup Office 365 Emails in the best way?
Outlook comes with built-in export functionality for supported PST exports, or a dedicated backup utility if you need additional output formats and the ability to export folders selectively.
2. Is it possible to backup Office 365 Emails to PST?
Yes, PST export can be done with supported Outlook workflows and also in the list of output formats supported by Office 365 Backup Software.
3. Can I backup specific Office 365 folders?
Selective folder export enables users to select the mailbox data they want to back up, according to product page.
4. How do I check Office 365 backup?
Look over sample messages, attachments and folders to make sure the data is accessible, open them up with compatible software and check that the exported files are there.